When your E-bike encounters a failure and requires motor replacement, follow the steps below to proceed with the replacement.
I. Preparation #
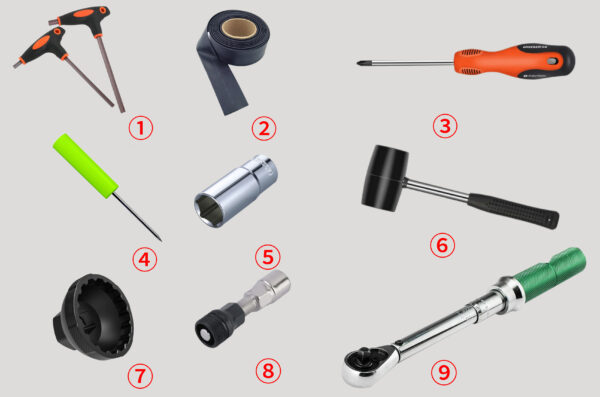 ① 5mm Allen wrench, 8mm Allen wrench
② Heat shrink tubing
③ Phillips screwdriver
④ Pin punch
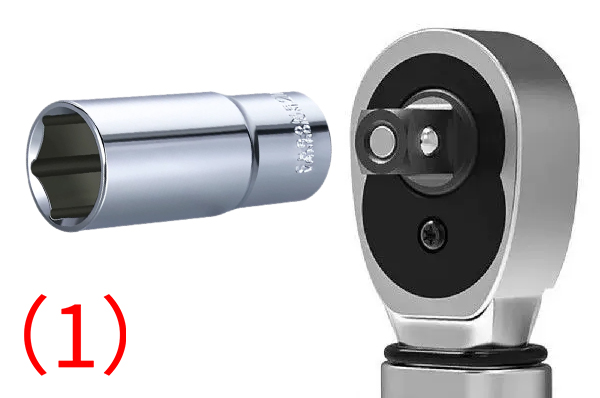
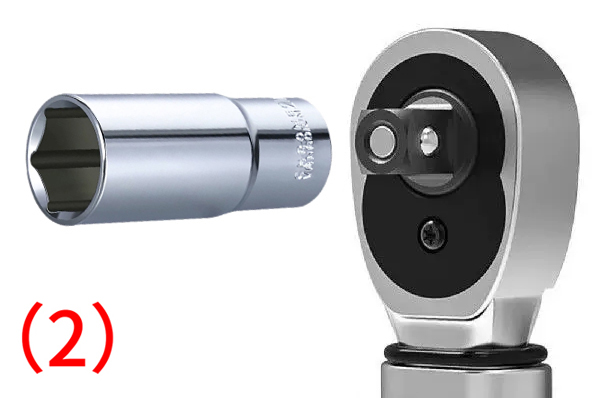
⑤ 13mm socket
⑥ Rubber mallet
⑦ 16-card 44 socket
⑧ Bottom bracket puller
⑨ Torque wrench
II. Precautions #
1、Before removing the motor, first remove the battery from the bike (as shown below). For detailed instructions on battery removal and installation, please refer to: https://www.frey-bike.com/docs/battery-installation-and-removal-instructions/
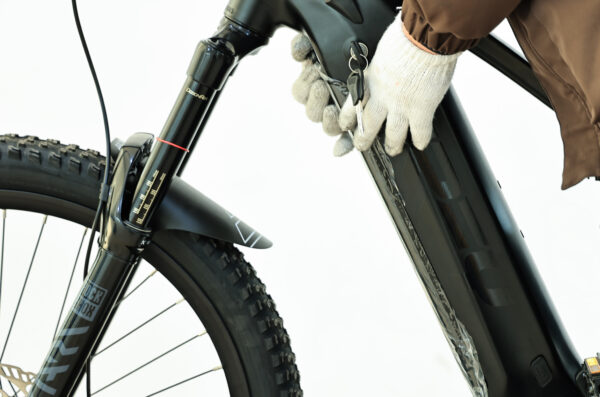
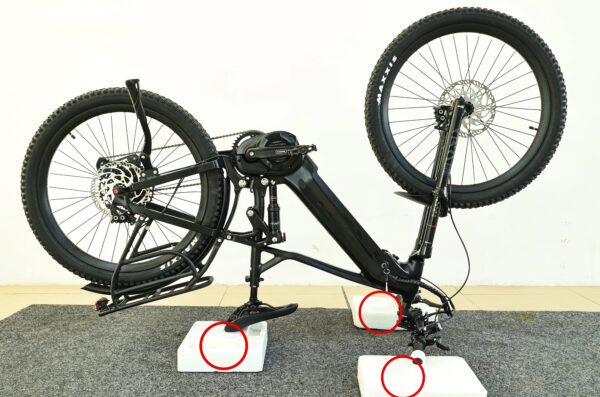
2、Place the bicycle upside down in a safe area. Add foam padding to the saddle and handlebars for protection (as shown below).
III. Removal Steps #
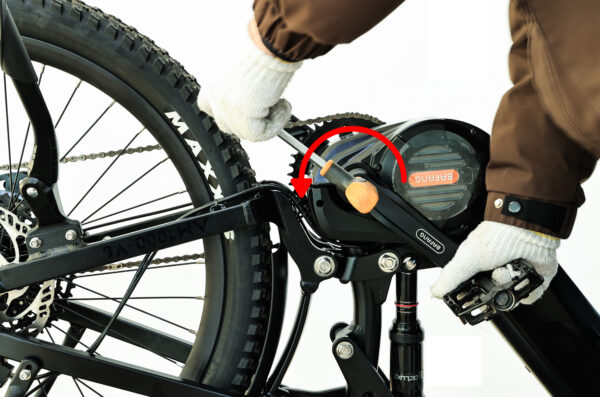
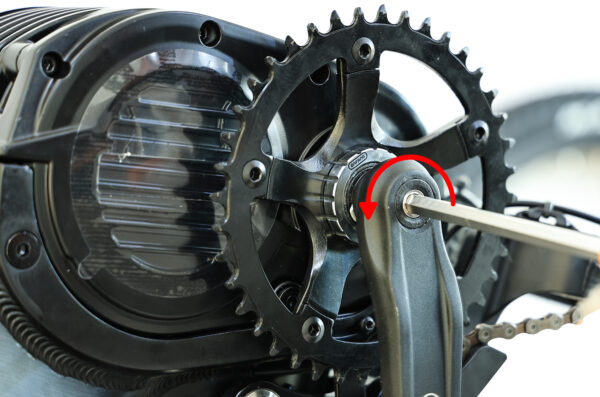
1、Use an 8mm hex wrench to rotate in the direction of the arrow and remove the crank screws (as shown below).
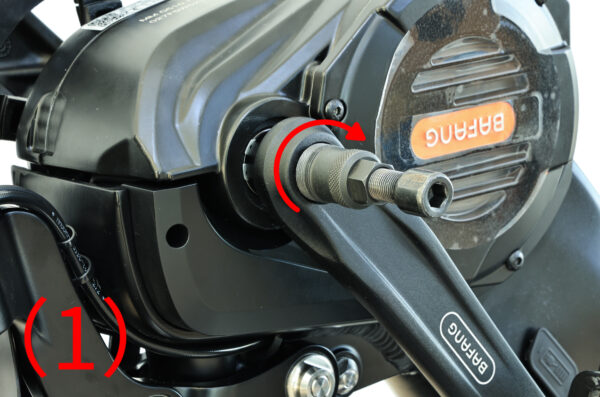
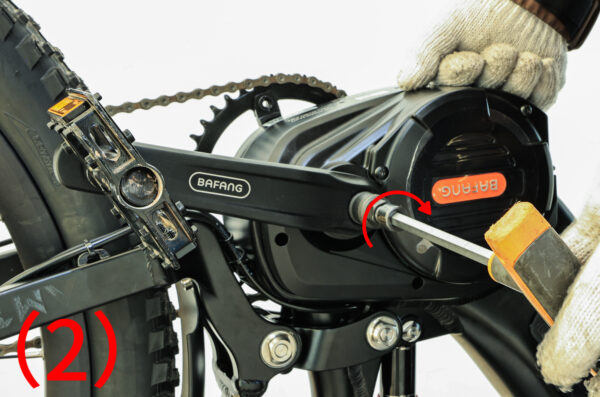
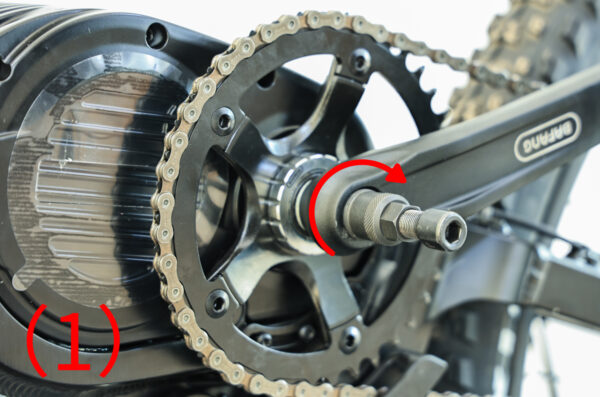
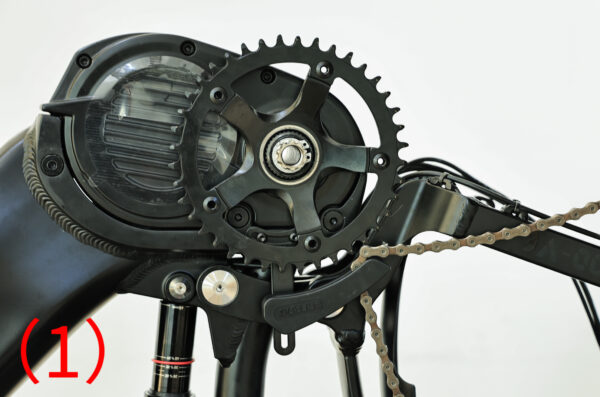
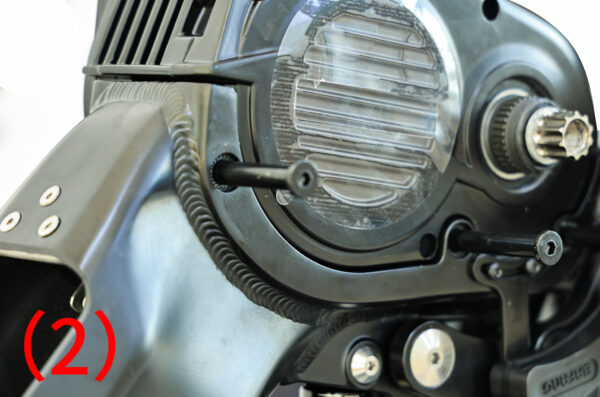
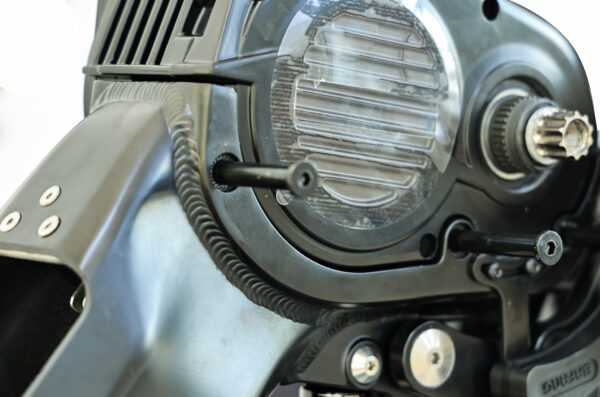
2、Use a crank puller to rotate in the direction of the arrow and insert it into the crank, as shown in Figure (1). Then, use an 8mm hex wrench to secure the other end of the crank puller and rotate in the direction of the arrow, as shown in Figure (2), until the crank is removed.
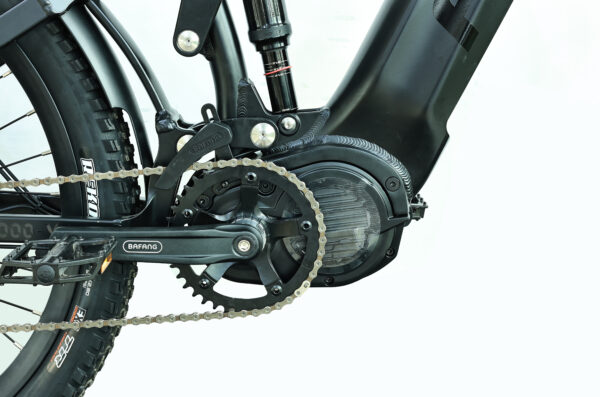
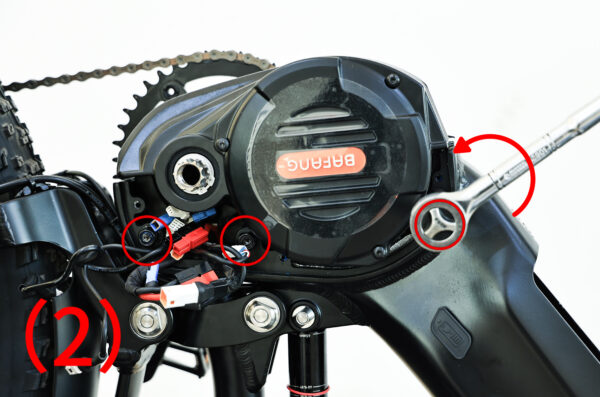
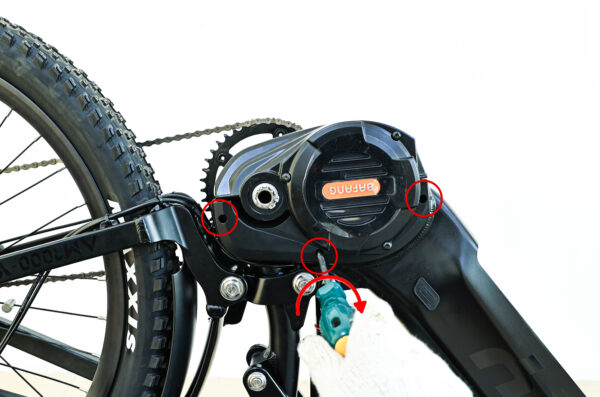
3、Use a Phillips screwdriver to rotate in the direction of the arrow and remove the three screws on the motor cover. (As shown below)
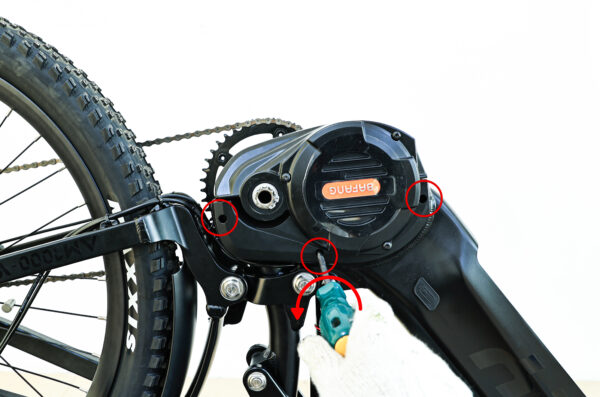
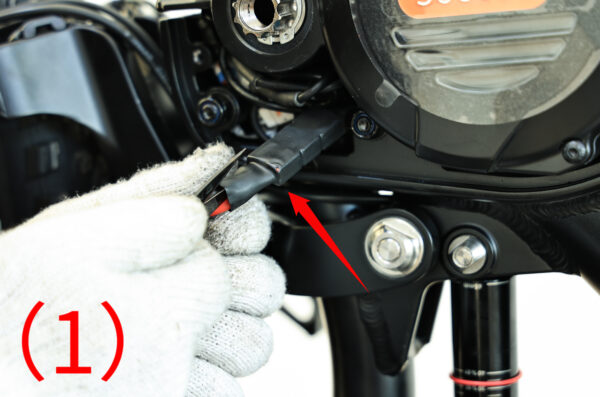
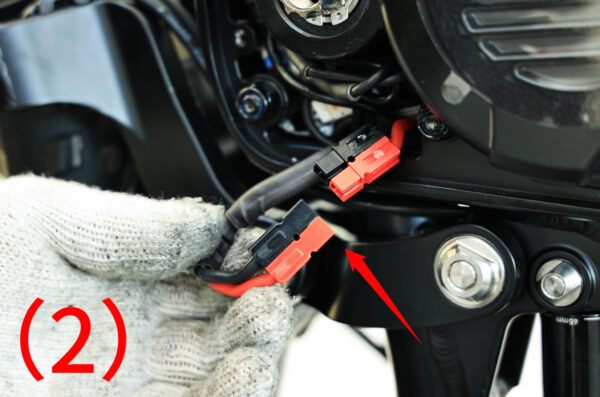
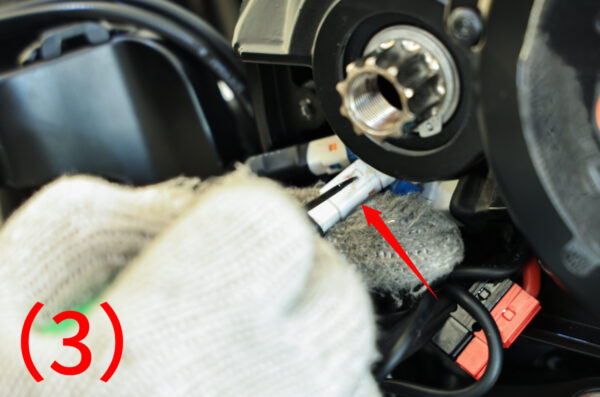
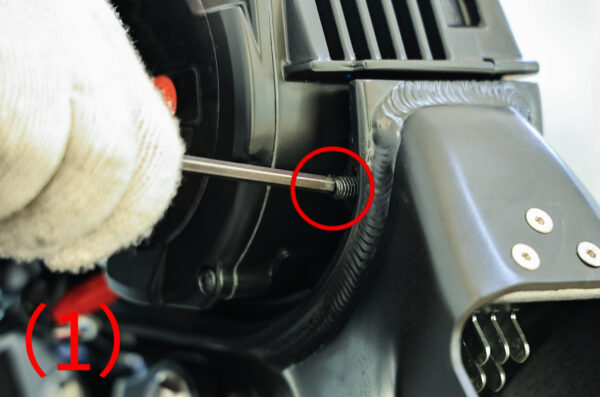
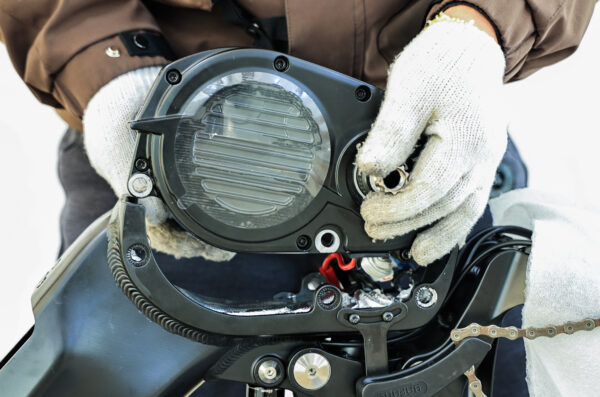
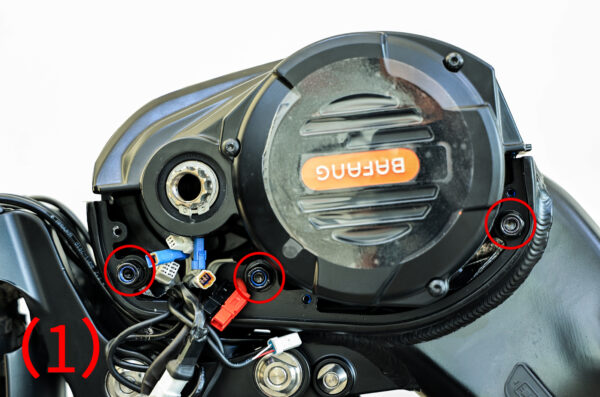
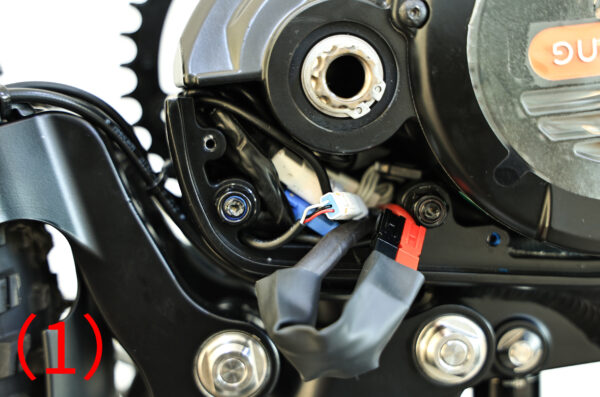
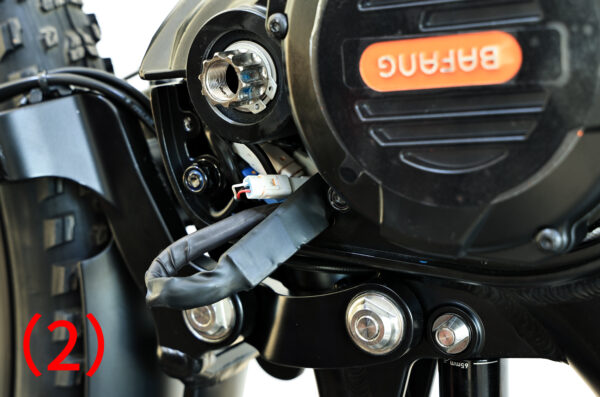
4、Use scissors to cut open the packaging of the power cable, as shown in (1). Disconnect the power cable, as shown in (2). Use a pin to sequentially remove all the motor cable connections, as shown in (3).
5、Attach a 13mm socket to the torque wrench, as shown in (1). Rotate in the direction of the arrow to remove the three motor fixing bolts, nuts, and washers, as shown in (2).
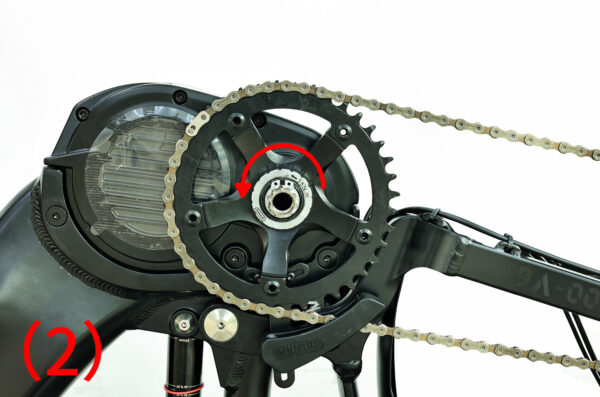
6、Use an 8mm Allen wrench and rotate in the direction of the arrow to remove the crank bolt on the side of the chainring, as shown in the picture.
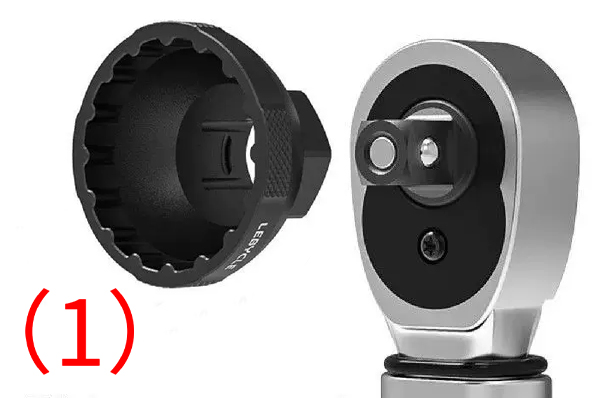
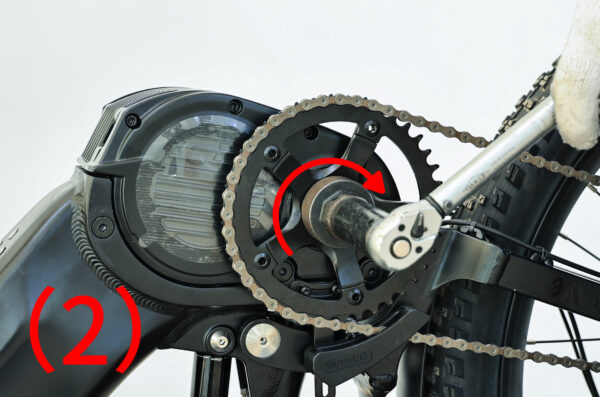
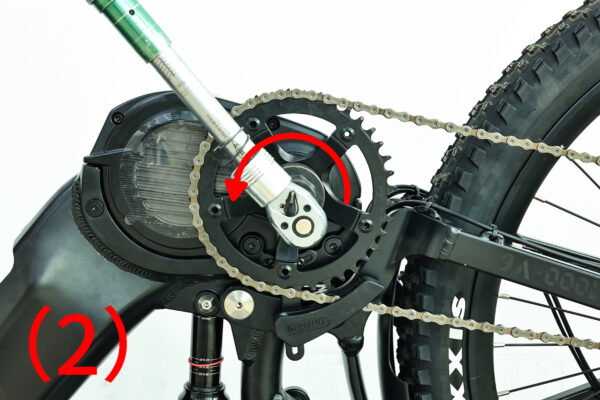
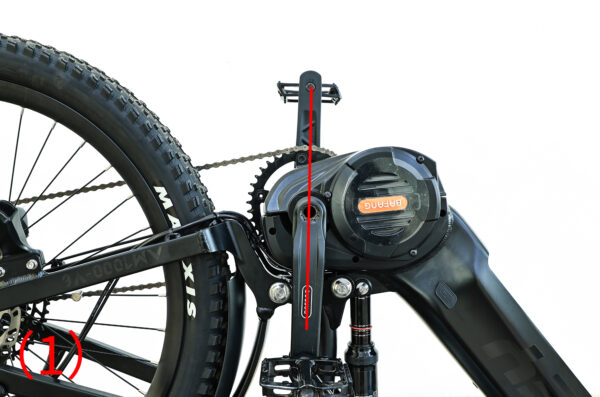
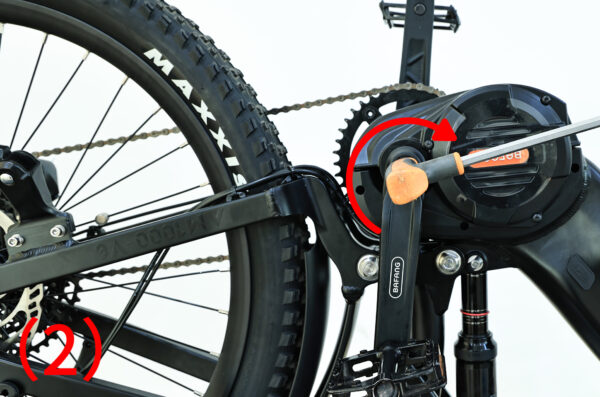
7、Use the bottom bracket puller and rotate it in the direction of the arrow to insert it into the crank arm, as shown in picture (1). Then, use an 8mm Allen wrench to insert the other end of the bottom bracket puller and rotate it in the direction of the arrow, as shown in picture (2), until the crank arm is removed.
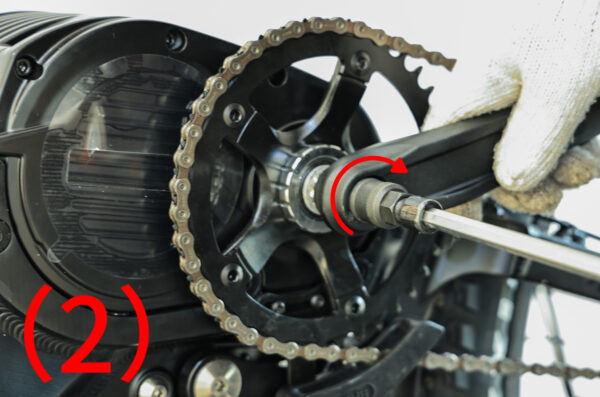
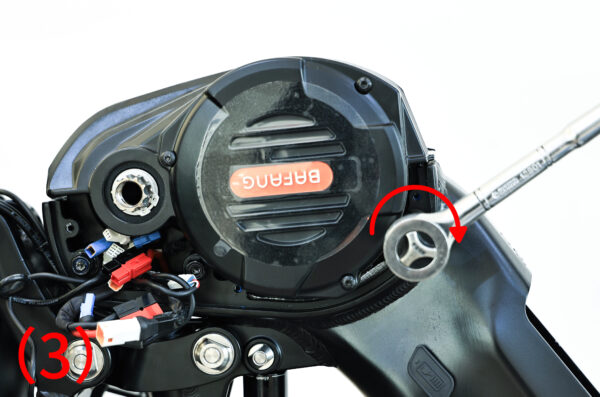
8、Attach the torque wrench to the 16mm x 44mm socket, as shown in picture (1). Rotate it in the direction of the arrow to remove the silver ring securing the chainring, as shown in picture (2).
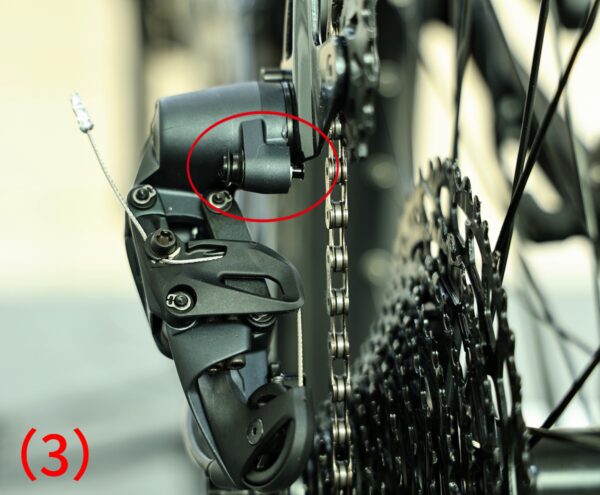
9、Push the derailleur forward with your right hand, as shown in picture (1). Press the rear derailleur lock button with your left hand, as shown in picture (2). Once the button pops out, release the hand pushing the derailleur. This will lock the guide plate in place, as shown in picture (3).
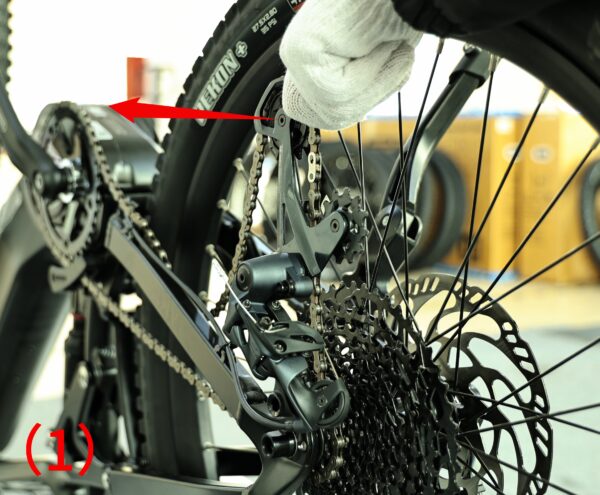

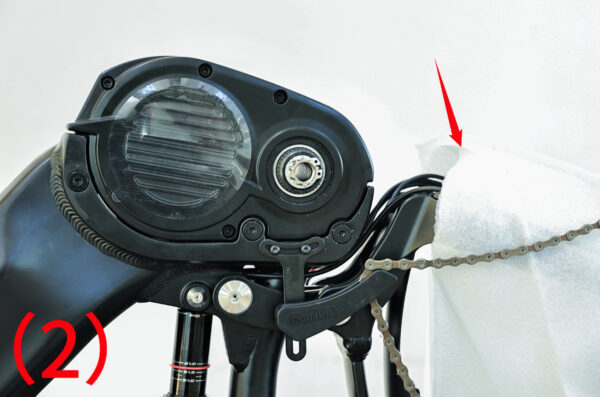
10、Remove the chain from the chainring, as shown in picture (1). Finally, remove the chainring. To prevent chain oil from staining the rear triangle, place a foam pad over the rear triangle as shown in picture (2).
11、Use a 5mm Allen wrench to hold the three fixed bolts securing the motor, as shown in picture (1). Then, use a rubber hammer to strike the wrench until the fixed bolts on the motor are loosened, as shown in picture (2).
12、Remove the old motor, as shown in the picture.
IV、Installation Steps #
1、Insert the new motor, as shown in the picture. When placing it, make sure to organize the motor wiring to avoid the wires being crushed or damaged.
2、Insert the three motor mounting bolts and tap them into place with a rubber hammer, as shown in the picture.
3、Install the nuts and washers on the three motor mounting bolts, as shown in picture (1). Attach a 13mm socket to the torque wrench, as shown in picture (2). Tighten the three motor shaft nuts by turning them in the direction of the arrow to a torque of 30 N.m, approximately 3.059 kgf, as shown in picture (3).
4、Install the chainring, as shown in picture (1). Rotate the silver ring to secure the chainring in place, as shown in picture (2).
5、Attach a 16mm x 44mm socket to the torque wrench, as shown in picture (1). Tighten the silver ring securing the chainring in place to a torque of 35 N.m, approximately 3.569 kgf, as shown in picture (2).
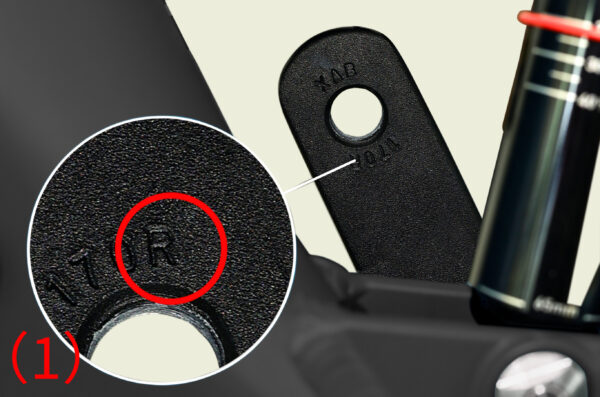
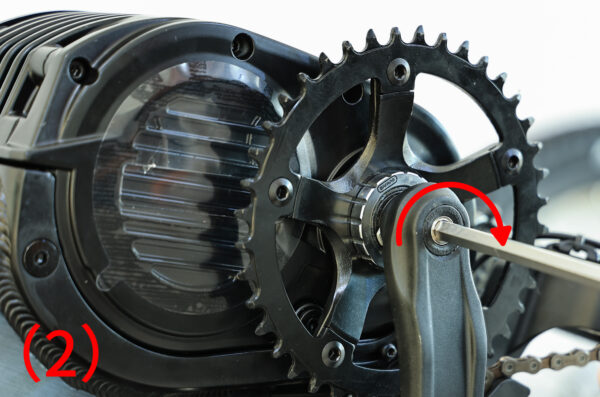
6、Install the crank on the side of the chainring, making sure the side marked with an “R” is facing outward, as shown in picture (1). Use an 8mm Allen wrench to tighten the crank fixing bolts in the direction of the arrow to a torque of 38-42 N.m, approximately 3.87-4.28 kgf, as shown in picture (2).
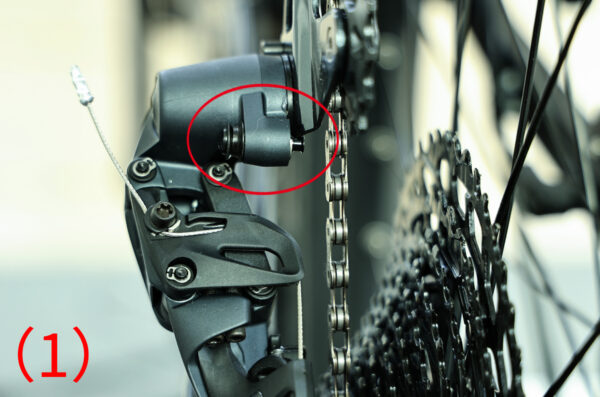
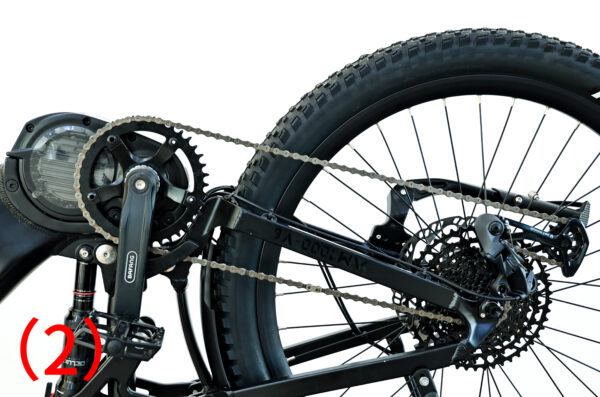
7、Install the chain, then push the derailleur forward. The rear derailleur lock button will automatically retract, as shown in picture (1). The chain tension will return to its original state, as shown in picture (2).
8、Connect all motor wires sequentially and cover the power cables with heat shrink tubing, as shown in picture (1). You can use a lighter or hot air gun to heat the tubing, allowing it to tightly grip the power cables to prevent them from falling off, as shown in picture (2).
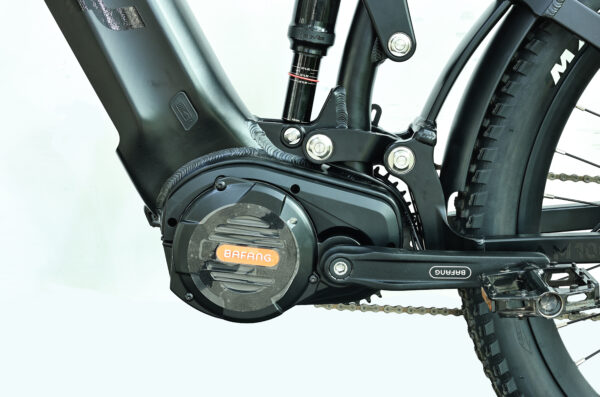
9、Install the motor cover, and use a cross screwdriver to tighten the three screws securing the motor cover in the direction of the arrow. The torque should be 3-5 N.m, approximately 0.306-0.51 kgf, as shown in the picture.
10、Install the other crank, ensuring the two cranks are positioned diagonally in relation to the horizontal line, as shown in picture (1). Use an 8mm Allen wrench to tighten the crank fixing bolts in the direction of the arrow to a torque of 38-42 N.m, approximately 3.87-4.28 kgf, as shown in picture (2).
V.Motor Installation Completed Illustration #